
How to Create Layout Grids in Adobe Illustrator: Column, Modular & Baseline Systems

Quick Answer: To create a layout grid in Adobe Illustrator, draw a vector rectangle covering your artboard canvas (minus margins), and navigate to Object > Path > Split Into Grid… to set your desired columns, rows, and gutter spacing. With the grid shapes selected, press Ctrl + 5 (Windows) or Cmd + 5 (macOS) to convert them into non-printing guides. For baseline typography grids, configure your preferences via Edit > Preferences > Guides & Grid to match your text leading.
Workflow Note
Manual grid construction is useful when you need to understand the math behind layout structures. For multi-artboard brand books, packaging boards, or commercial visual systems, GridMaster generates column, modular, baseline, and composition grids directly on your active Illustrator artboard in seconds.
1. Introduction: Why Grid Systems Matter in Brand & Layout Design
A successful visual layout relies on structural alignment. Whether you are building a 36-page corporate brand guidelines book, designing a vector packaging layout, or wireframing a mobile interface, a grid system provides vertical and horizontal rhythm. Grids establish visual alignment boundaries, define hierarchy, and ensure that text columns, image frames, and logo marks align consistently.
Without a structured grid, aligning text frames and visual assets becomes guesswork. Anchor points drift by fractions of a pixel, and columns end up with unequal margins. In Adobe Illustrator, creating precise layout systems requires a clear understanding of path operations, sub-pixel math, and alignment techniques.
Using layout grids provides several core benefits for graphic designers:
- Consistent Visual Alignment: Elements line up predictably across multi-page brand books, brochures, and digital presentations.
- Faster Design Decisions: Grids provide pre-defined boundaries for image dimensions and body copy text boxes, eliminating guesswork during rapid layout exploration.
- Improved Typographic Hierarchy: Aligning headlines, subheads, and body copy to baseline tracks creates comfortable, professional reading experiences for target audiences.
- Seamless Collaboration: When multiple designers or production artists work on a brand system, shared grid parameters ensure all team members adhere to identical margin, column, and gutter coordinates.
2. Understanding Grid Layout Concepts: Columns, Gutters, and Baselines
Laying out a grid requires balancing a few key dimensions: your artboard width, the number of columns, the margins around the edges, and the gutters (the spacing between columns).
2.1 Columns and Gutters
To establish a clean grid, columns must be mathematically identical. If they are even slightly off, your elements will suffer from sub-pixel alignment issues, leading to blurry pixel edges on screens or alignment errors in print. Gutters represent the negative space between adjacent columns, preventing text blocks from colliding visually.
2.2 Typographic Baseline Grids
A baseline grid controls vertical spacing and typography rhythm. It consists of horizontal lines running down your page. To keep your body text aligned perfectly across different columns, configure your baseline grid increment to match the line-height (leading) of your text. For example, if your body text is set to 10pt with 14pt leading, your baseline grid lines should repeat exactly every 14pt.
2.3 Modular Grids
A modular grid adds horizontal rows to your column system, creating a matrix of cells (modules). This structure is ideal for complex layouts, such as magazine pages, portfolio websites, or brand guidelines, because it gives you consistent horizontal and vertical boundaries for sizing images and text blocks.
3. How to Set Up a 12-Column Grid in Illustrator (Manual Method)
The 12-column grid is the industry standard for both print and web design because 12 is cleanly divisible by 2, 3, 4, and 6. This flexibility allows a single master grid to house 2-column, 3-column, 4-column, or asymmetrical layouts effortlessly.
Step 1: Draw the Base Artboard Boundary Shape
- Select the Rectangle Tool by pressing M.
- Click once on your canvas. Enter the width and height of your active artboard (e.g.
1920pxby1080px). Press Enter. - Open the Align Panel (Window > Align). Set Align To to “Align to Artboard”, then click Horizontal Align Center and Vertical Align Center to position the shape.
- With the rectangle selected, open Object > Path > Offset Path…
- Enter a negative value matching your margins (e.g.,
-50px) to create an inner boundary box. Click OK. - Delete the outer rectangle, leaving the inner margin box selected.
Step 2: Split the Path into 12 Grid Columns
- Select the inner margin rectangle.
- Navigate to Object > Path > Split Into Grid…
- In the options dialog, check the Preview box to monitor your grid in real-time.
- In the Columns input, set Number to
12. - In the Gutter input, enter your desired gutter width (e.g.
16px). Keep the column width blank; Illustrator will calculate this automatically. - Click OK. Illustrator will generate 12 individual column rectangles.
Step 3: Convert Grid Segments to Non-Printing Guides
- Ensure all 12 column shapes are selected.
- Convert them to guides by pressing Ctrl + 5 (Windows) or Cmd + 5 (macOS), or navigate to View > Guides > Make Guides.
- Create a new layer in your Layers Panel (F7), rename it to
Guides, and drag the guide paths into it. - Lock this layer to prevent moving the guides while designing.
4. How to Create a Modular Grid in Adobe Illustrator
Modular grids divide your artboard both vertically into columns and horizontally into rows, forming a structural matrix of module cells.
- Select your inner margin rectangle (or draw a new outer boundary).
- Open Object > Path > Split Into Grid…
- In Rows, set Number to
6(or8) and Gutter to16px. - In Columns, set Number to
12and Gutter to16px. - Check Preview to inspect the matrix of grid cells.
- Click OK, then press Ctrl + 5 (Windows) / Cmd + 5 (macOS) to convert the matrix into modular vector guides.
Modular grids are particularly effective when laying out brand book style guides:
- Header Blocks: Span across all 12 columns in top row modules.
- Image Slots: Span 4 columns by 3 rows for balanced landscape image frames.
- Sidebar Spec Cards: Span 3 columns by 4 rows for color swatches and typography rules.
5. How to Set Up Baseline Grids for Typography
- Open preferences by pressing Ctrl + K (Windows) or Cmd + K (macOS), and select the Guides & Grid tab.
- Under Grid, set Gridline every to your body text leading value (e.g.
14ptor18px). - Set Subdivisions to
1. - Click OK.
- Toggle visibility via View > Show Grid (Ctrl + ” on Windows or Cmd + ” on macOS).
- Enable snapping via View > Snap to Grid (Ctrl + Shift + ” on Windows or Cmd + Shift + ” on macOS).
When working with baseline grids, always set paragraph text box options to First Baseline: Cap Height or Leading in the Area Type Options dialog (Type > Area Type Options) to ensure initial text lines sit flush on baseline tracks.
6. How to Turn On, Show, and Edit Grid Lines in Illustrator
- Show / Hide Grid: Select View > Show Grid (or View > Hide Grid).
- Show / Hide Guides: Press Ctrl + ; (Windows) or Cmd + ; (macOS).
- Lock / Unlock Guides: Press Ctrl + Alt + ; (Windows) or Cmd + Option + ; (macOS).
- Change Grid Line Color & Style: Go to Edit > Preferences > Guides & Grid to switch grid lines between continuous lines and dotted tracks, or change the color to high-contrast cyan or magenta.
7. Professional Solution: 1-Click Grid Generation with GridMaster
While manual “Split Into Grid” calculations work for single artboards, modifying multi-artboard documents or updating margins during client revisions is time-consuming.
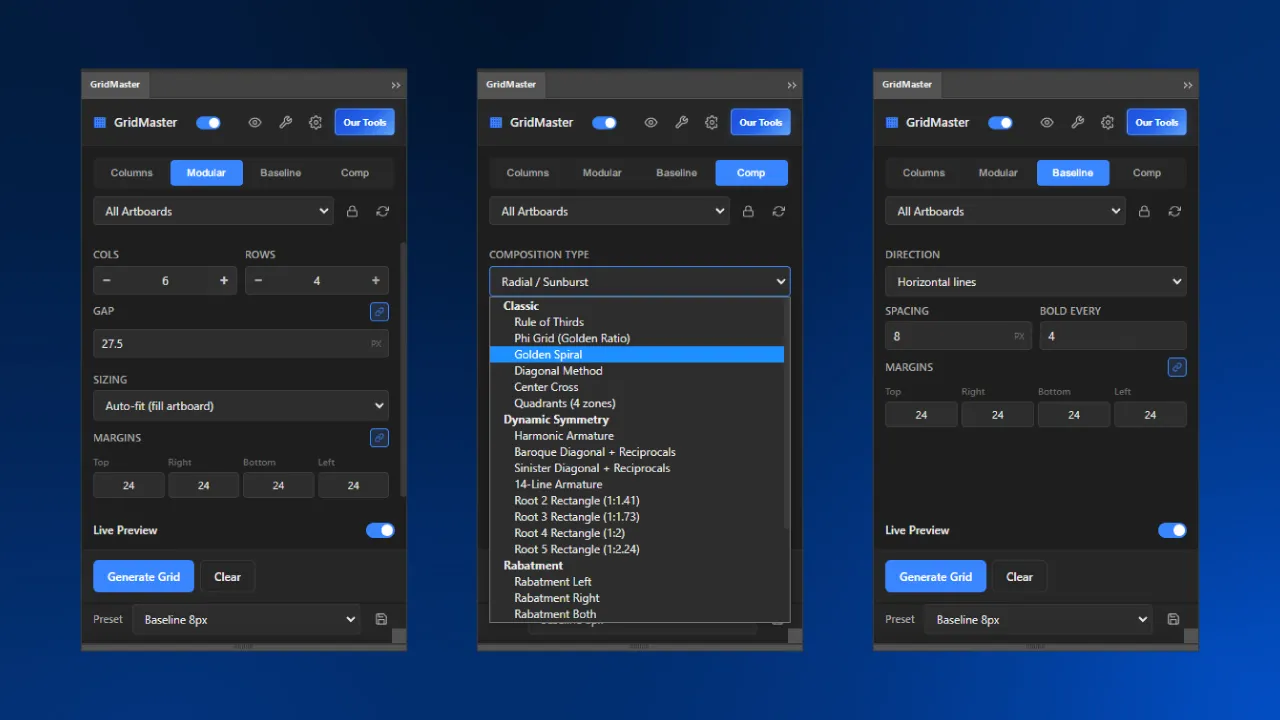
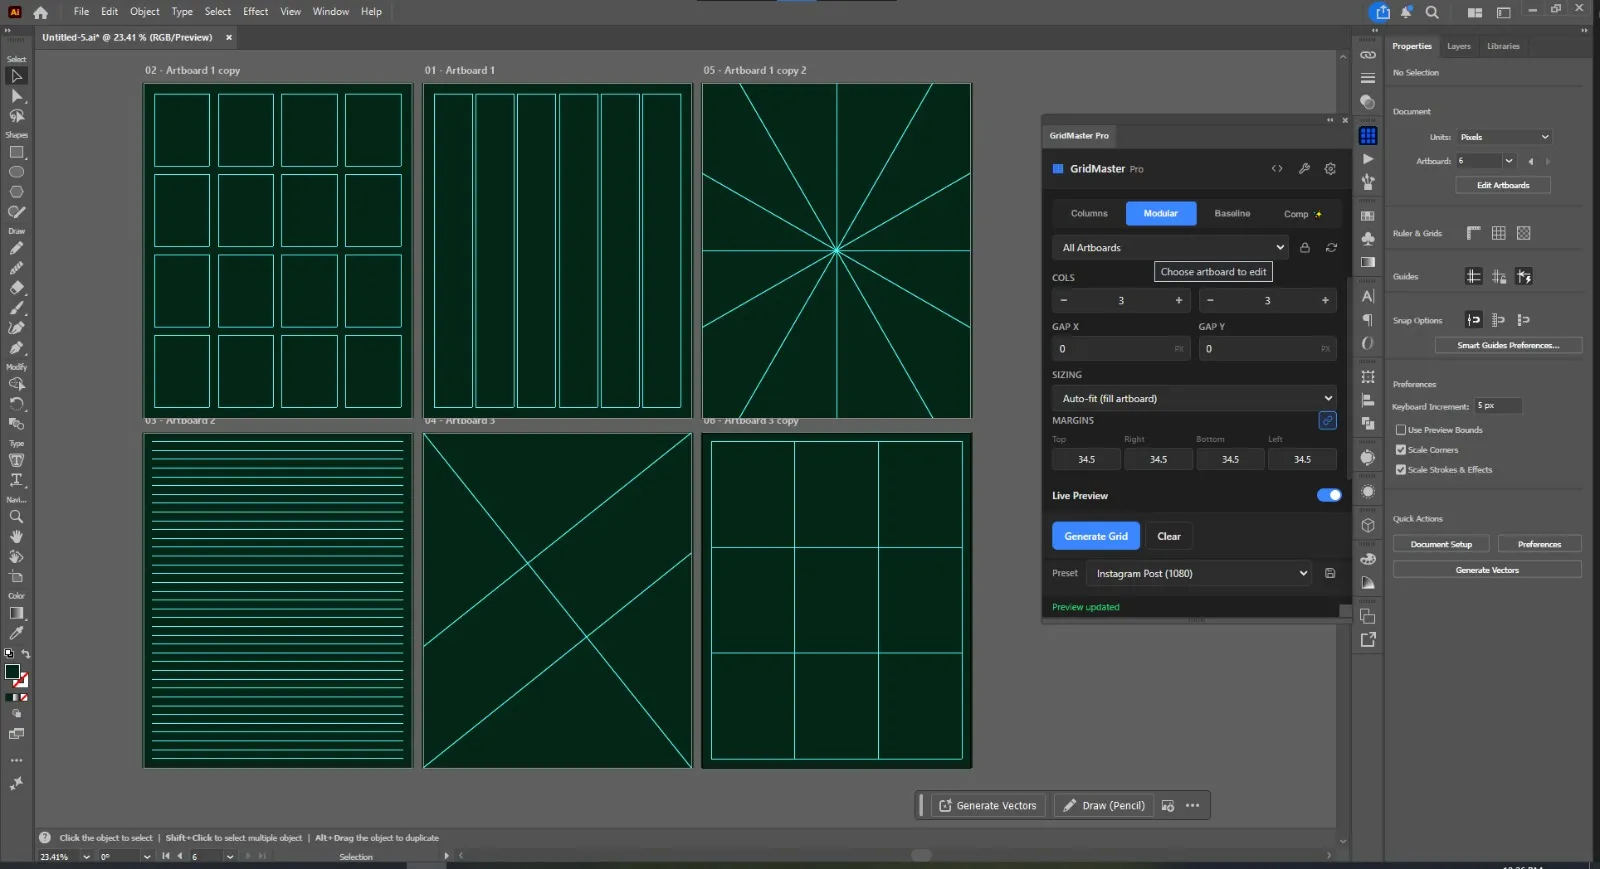
The GridMaster panel extension automates layout creation natively inside Adobe Illustrator:
Why Top Studios Use GridMaster:
- Instant Sliders: Drag live sliders to tweak column count, rows, margins, and gutters in real-time.
- Classical Composition Overlays: Generate Rule of Thirds, Golden Ratio / Fibonacci Spirals, and Diagonal Root Grids instantly.
- Preset Saving: Save custom grid presets for corporate brand books, social media graphics, and stationery handoffs.
8. Common Layout Grid Mistakes to Avoid
- Sub-Pixel Fractional Gutters: Entering arbitrary gutter values (e.g.
14.37px) causes sub-pixel anti-aliasing and blurry edges on digital screens. Always use integer pixel values. - Mismatched Baseline Leading: Setting baseline increments that differ from your paragraph leading leads to misaligned text blocks across multi-column layouts.
- Missing Safety Margins: Positioning grid columns directly on the canvas boundary without margin padding. Always leave at least
30px–50pxouter space for visual breathing room. - Cluttered Workspace Overlays: Keeping multiple guide systems visible simultaneously. Create clean layers for column guides and baseline tracks so you can toggle them as needed (Ctrl + ; / Cmd + ;).
9. Frequently Asked Questions (FAQ)
How do I make a 12-column grid in Illustrator?
Draw a rectangle matching your artboard size minus margins, navigate to Object > Path > Split Into Grid…, set Columns to 12 with a gutter (e.g. 16px), click OK, and press Ctrl + 5 / Cmd + 5 to make guides.
Why is “Split Into Grid” greyed out in Illustrator?
“Split Into Grid” requires an active vector shape selection. Select a drawn rectangle on your artboard before opening the Object menu.
What is the shortcut to convert shapes into guides?
Select your vector shapes and press Ctrl + 5 on Windows or Cmd + 5 on macOS.
10. Conclusion & Next Steps
Establishing a structured grid system elevates your design work from amateur to agency level. To see a complete 12-column layout system in action, download our Ultimate Brand Guidelines Template, built from the ground up on modular grid rules for Adobe Illustrator and InDesign.
Table of Contents
Recommended Tools
GridMaster
Create precise, professional vector layouts in seconds. GridMaster generates column, modular, baseline, and composition grids in Illustrator.
Logo Grider
Build logo grids, clear space rules, lockups, and minimum size systems in seconds. Logo Grider is a powerful Illustrator panel for logo designers.
ColorLens
Generate palettes, check WCAG contrast, extract image colors, and export specification sheets directly inside Adobe Illustrator with ColorLens.
Identity Assets
Bold Brand Guidelines Template
A high-performance landscape layout template for InDesign, Figma, and Illustrator. Deliver agency-level brand style guides to your clients.
Free Brand Guidelines Template
A clean brand guidelines template fully editable in Adobe Illustrator and InDesign. Ideal for freelancers and agencies organizing brand rules.
Ultimate Brand Guidelines Template
The ultimate 36-page professional brand guidelines template for Adobe Illustrator, InDesign, and Figma. Deliver agency-level brand books to clients.
Glossary Terms
Get New Branding Resources Every Week
Join over 10,000 identity designers who receive our latest curated tutorials, grid templates, checklists, and Illustrator workflow optimizations straight to their inbox.
Zero spam. Unsubscribe with a single click at any time.
Continue Reading
Baseline Grid in Illustrator: How to Align Typography and Vertical Rhythm
Master typographic baseline grids in Adobe Illustrator. Learn leading math, Preferences configuration, and Area Type first baseline offset alignment.
How to Make a 12-Column Grid in Adobe Illustrator (Manual Method & 1-Click Guides)
Learn how to set up a mathematically balanced 12-column layout grid in Adobe Illustrator. Step-by-step tutorial covering columns, gutters, margins, and guides.
How to Make a Grid in Adobe Illustrator: 3 Practical Methods (Document, Guide & Vector Grids)
Learn how to make and customize grids in Adobe Illustrator. Step-by-step tutorial covering document background grids, layout column guides, and vector meshes.